Modelling and Texturing
A guide for creating 3D models for use in Return to Paradise
Things You Must do For All 3D Models
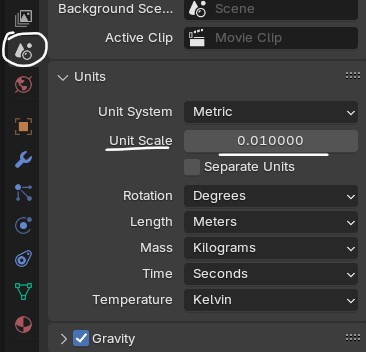
Set unit scale to .01 Meters (for proper unreal importing)
All models must have -Y as its forward axis
Name all objects (RTP_ObjectName)
Name all materials (RTP_ObjectName_MaterialName)
Pack the .blend file with any textures used, if textures where used
Apply all transforms
There are exceptions to this rule, do not apply the location transform to:
- Piñata Eyes
- Broken Meshes
- Tree/Bush Fertilised Branches
Apply all modifiers, except the Armature modifier
The origin point is at the base of the model and at the world origin
It is important that models are game ready. This means the topology should be made up of only triangles and quads. There should also be a reasonable balance between geometry and the level of detail.
Piñatas
Points that apply to the modelling of piñatas for Return to Paradise
Modelling Guide
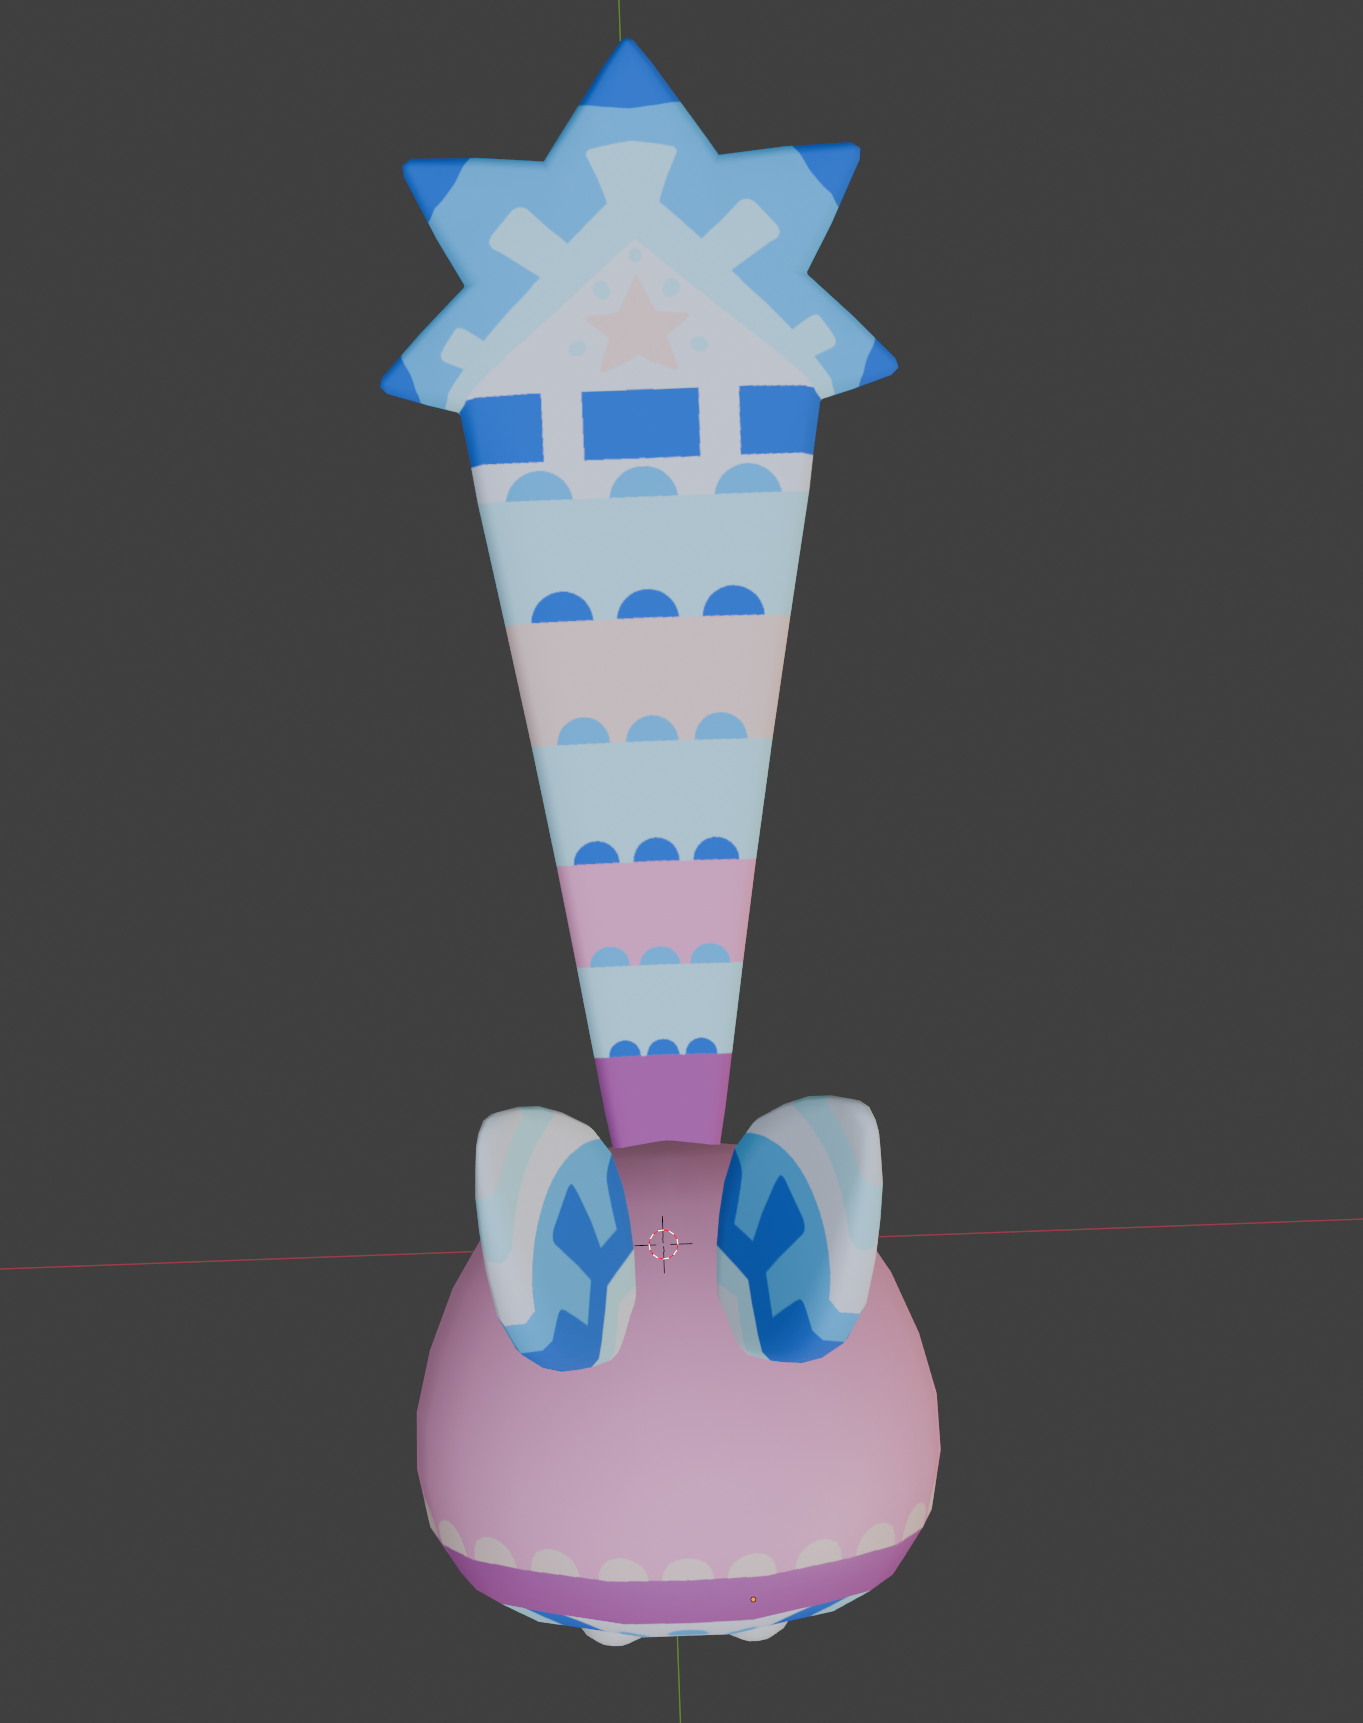
Pose
The piñata must be modelled in the most neutral pose possible. This is to ensure that the mesh deforms properly when we come to rigging and animating it. This means a straight spine, straight legs, a straight tail, straight ears, etc. Please ask if you are unsure.
Topology
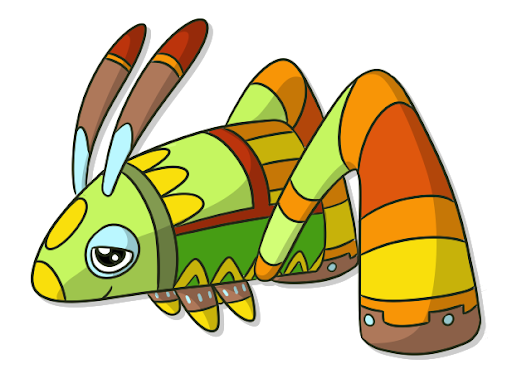
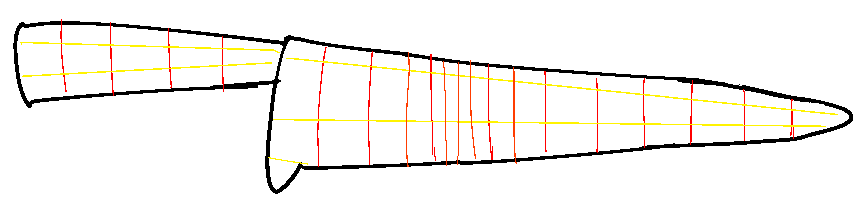
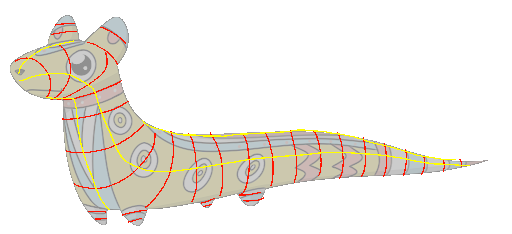
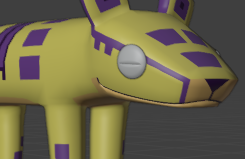
For piñatas the topology also needs to animate well, as you can see in the above image of the slug, the edge loops of the piñata need to oriented perpendicularly to the direction the model is expected to flex. You can also see that at the points that are expected to deform the most there is extra geometry to help facilitate it.


Adding Eyes
Important Points
- Eyes are hemispheres not hemi-roundcubes
- One must ensure the that the origin of the eyeball remains at the exact centre of the sphere at all times
- With the exception of sours, eyes are added in engine, however they act as an important reference throughout the procress of creating a game ready piñata
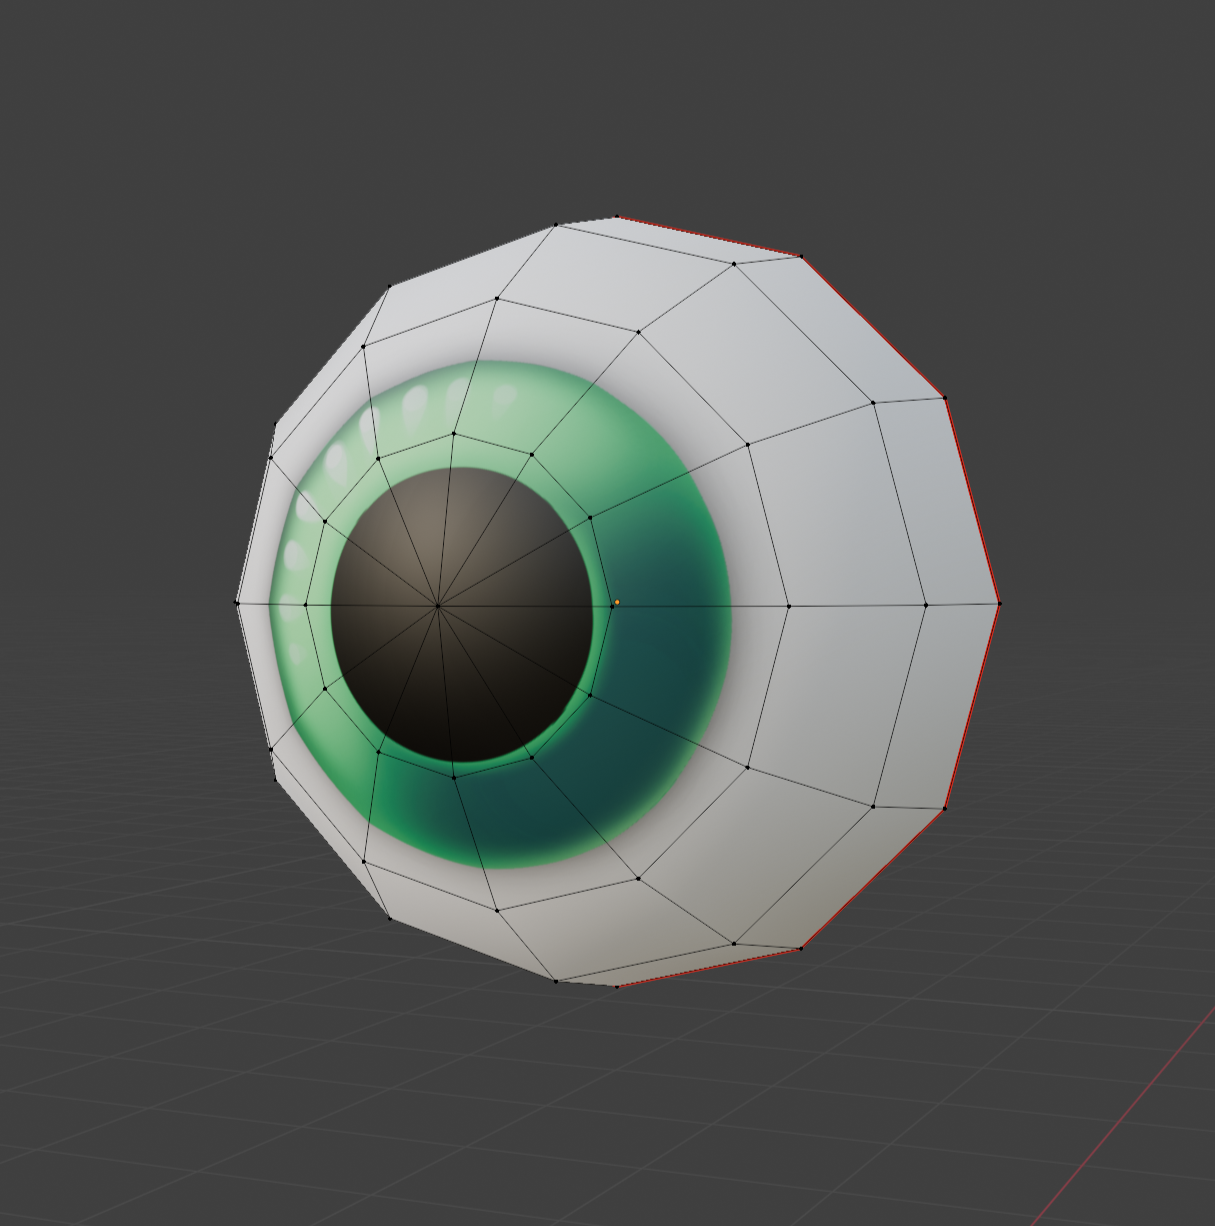
How to Make an Eyeball
1 - Add a UV sphere, you can fiddle around the number of segments and rings it has, you can often get away with less than you think.
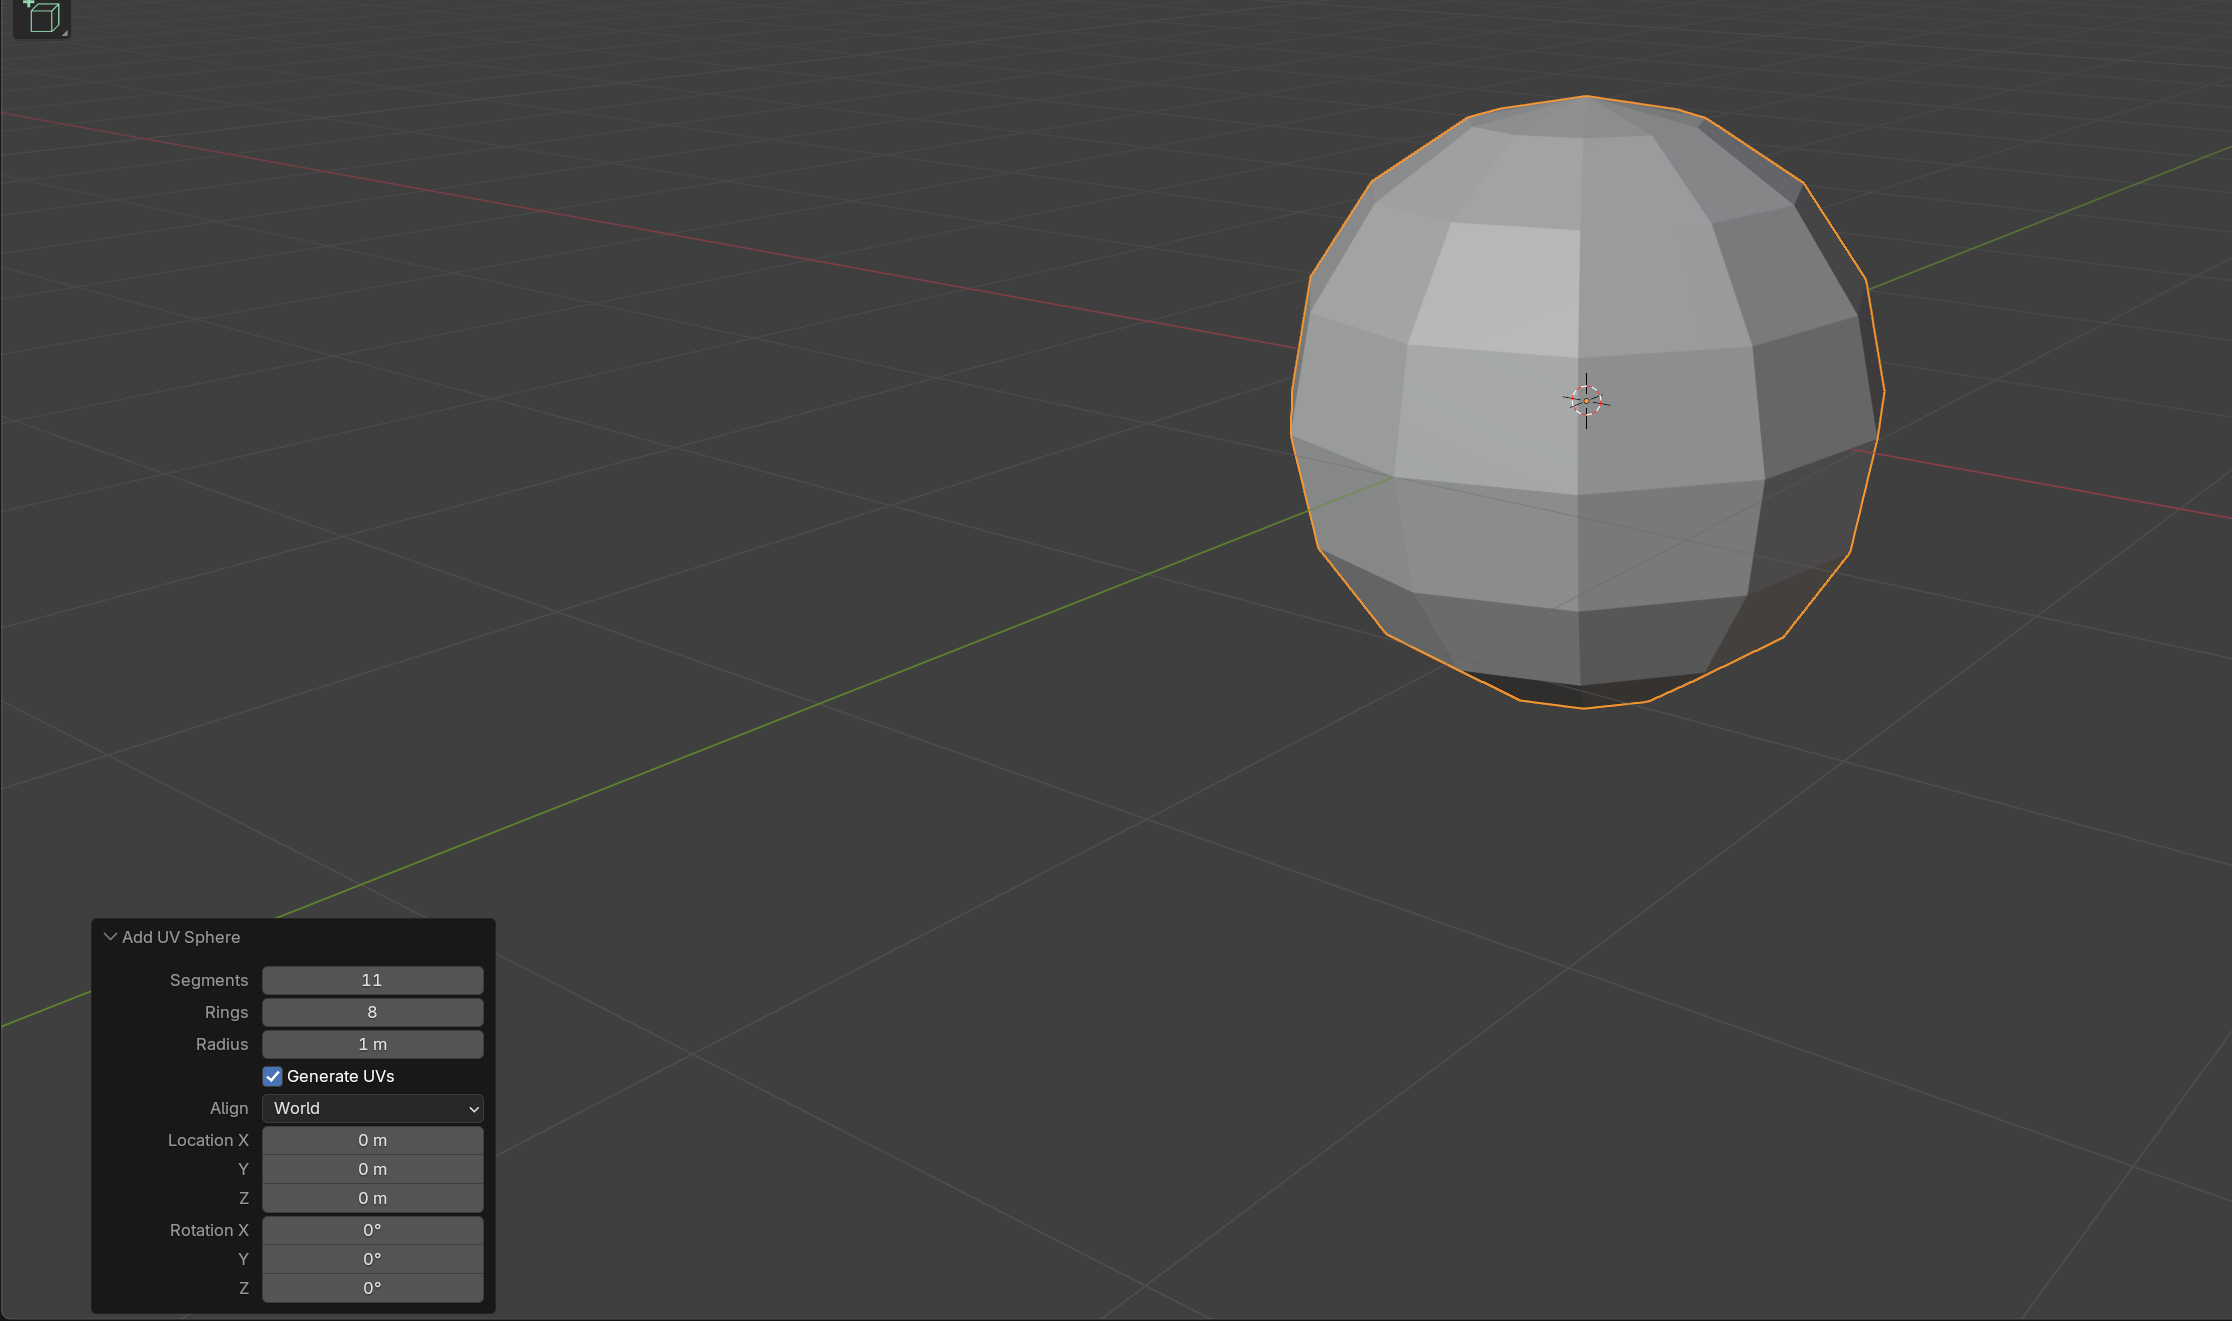
2 - Rotate it 90 degrees so the pole of the UV sphere it facing where the iris would be
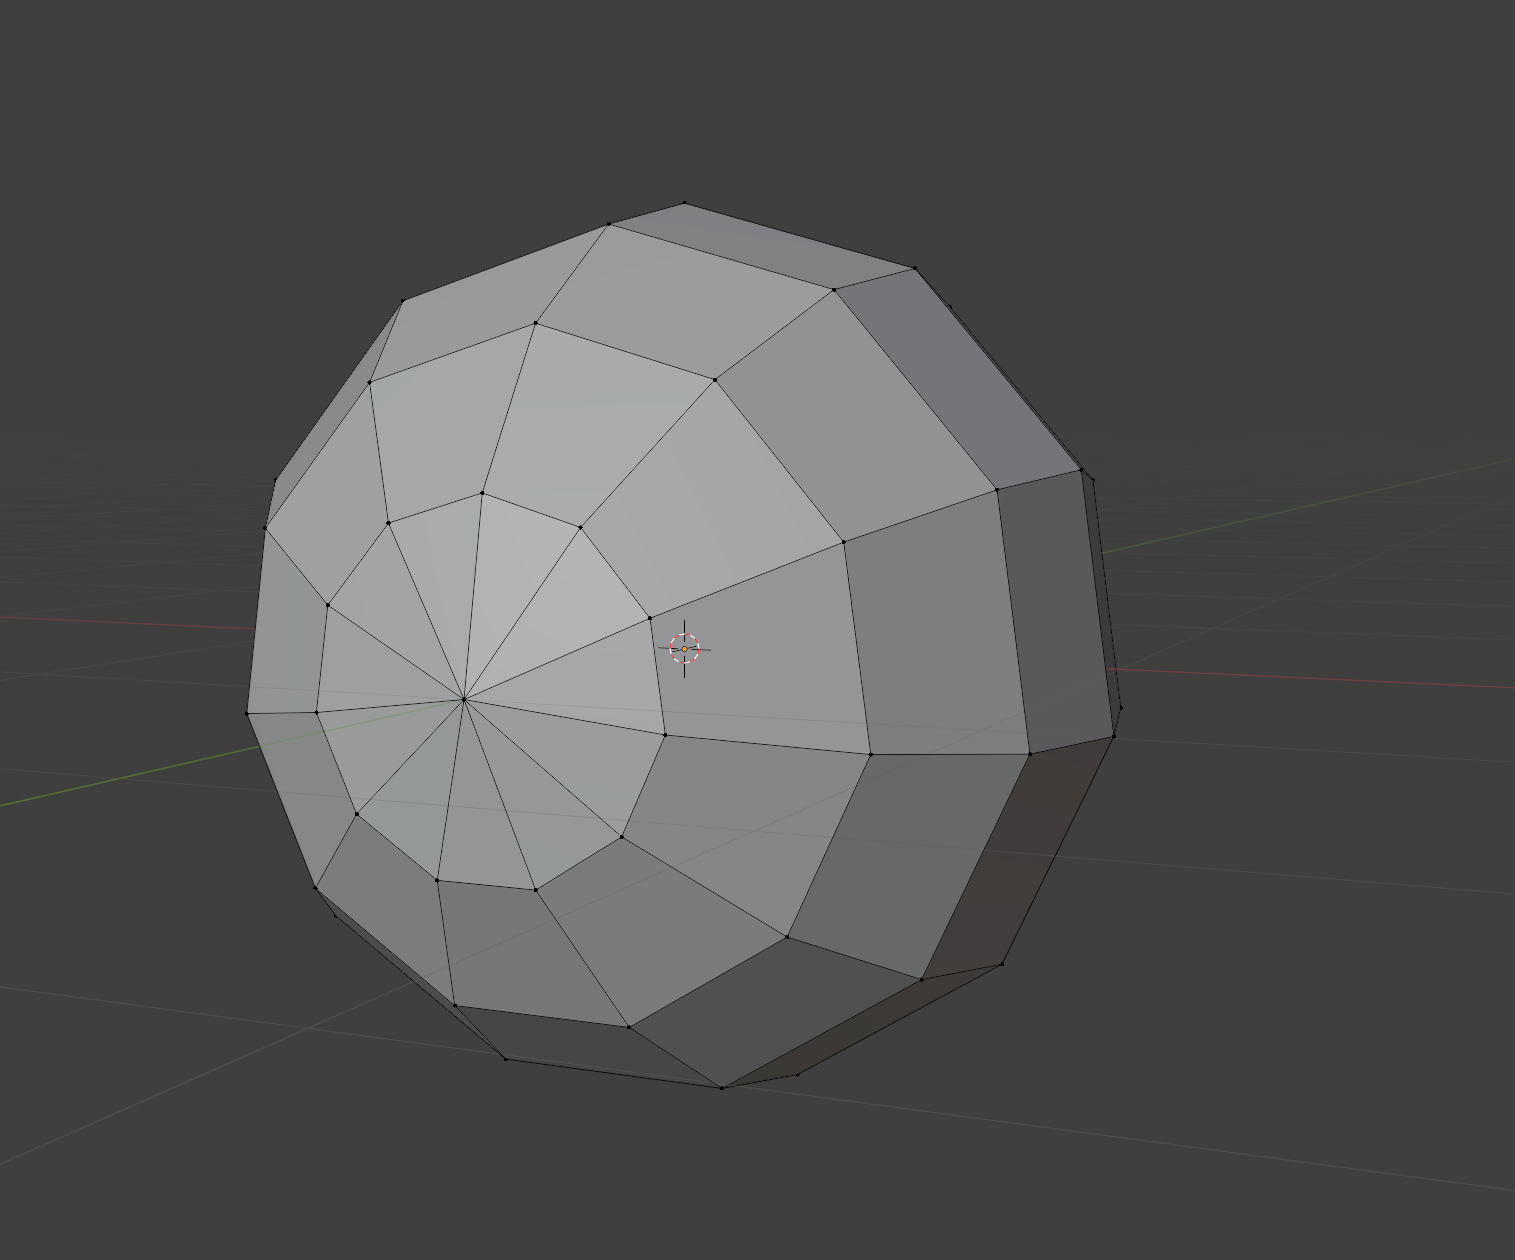
3 - You can now texture this (for sweet piñatas the eyeball should be a separate UV unwrap, for sour piñatas I need clarification) and delete some of the back faces of the eye that are not needed
Wildcards (If Applicable)
There are two types of wildcards, ones that add a new part where there was nothing before, and wildcards that replace an existing part with another part. We will discuss both in this guide.
Wildcards That Add a New Part
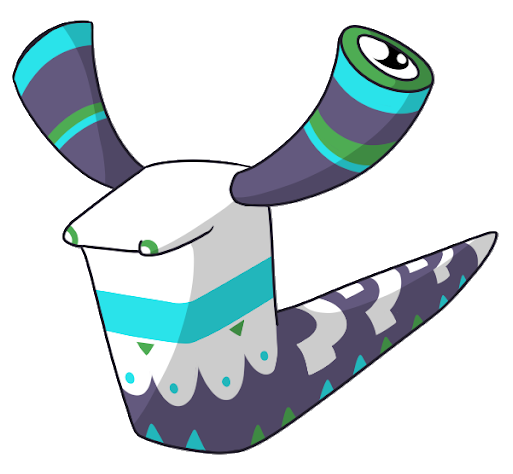
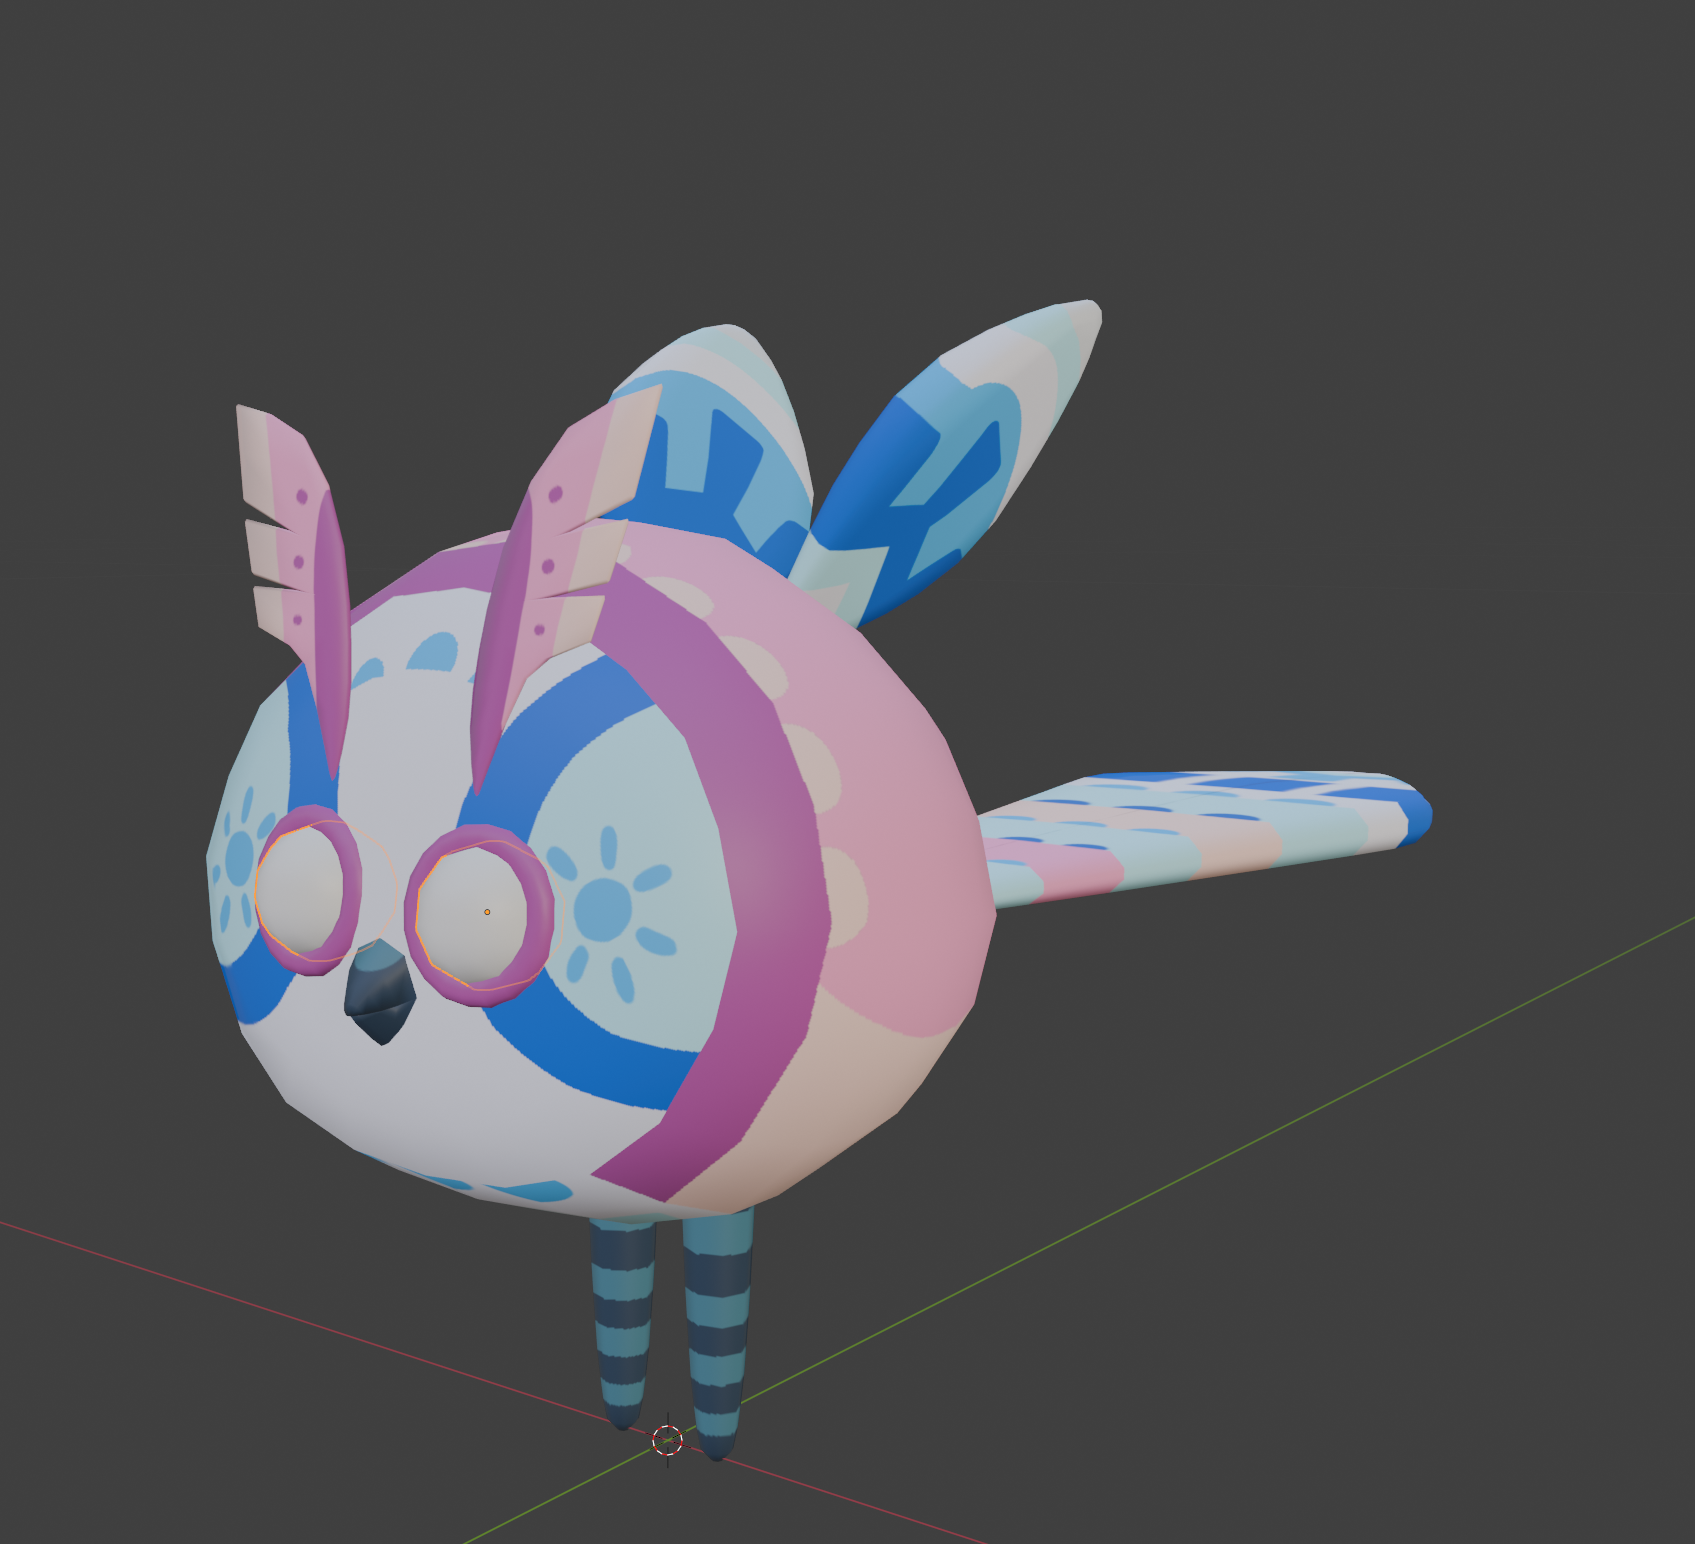
For wildcards that add a new part where there was nothing previously, you model the wildcard part as a separate mesh. You can see an example of this type of wildcard on the images of the Chirpix below, where on the left we see the model without the wildcard mesh being visible, then on the right hand side we see the Chirpix along with the wildcard eyebrows being visible.

Wildcards That Replace an Existing Part
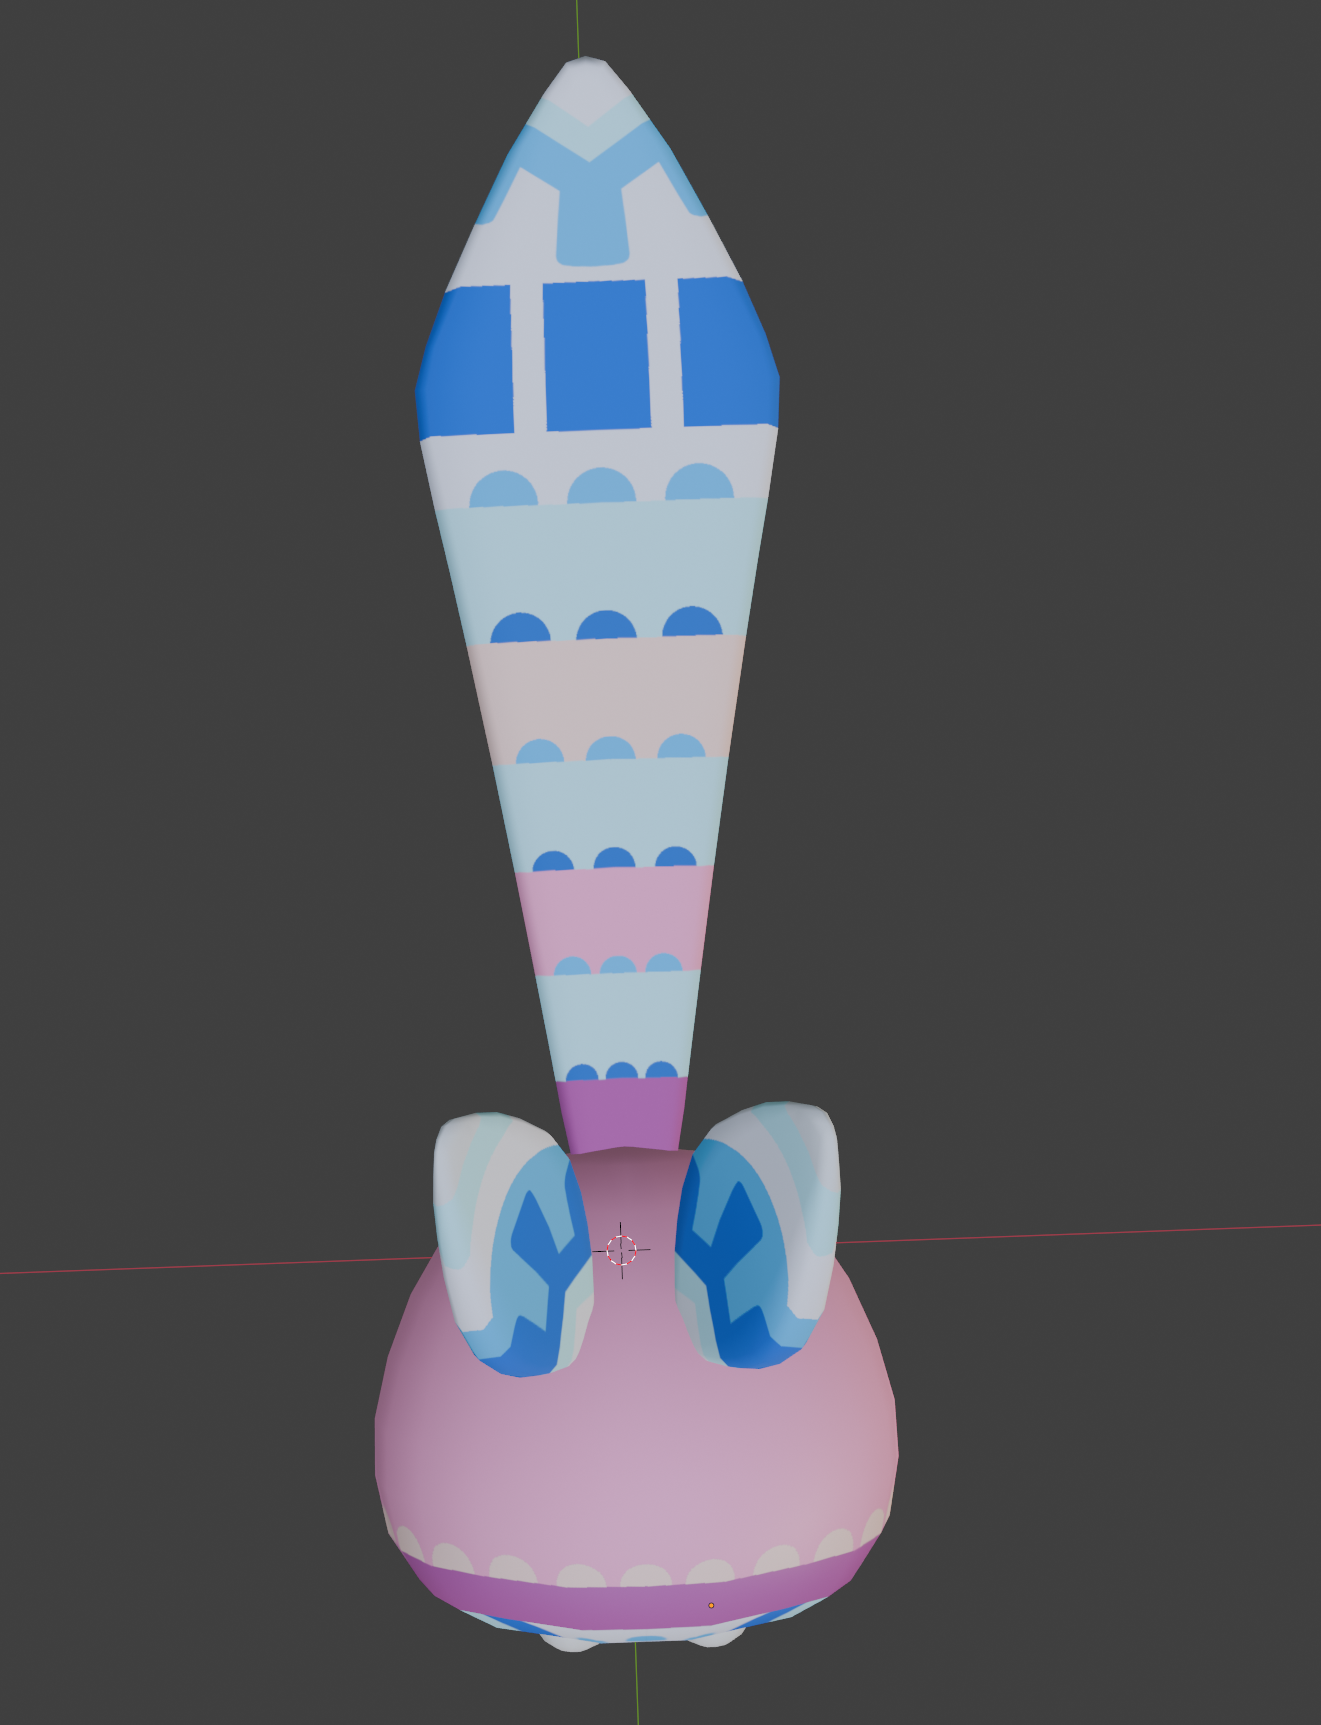
For wildcards that replace a part that would normally be on the piñata with a new part, you model both the part that would normally be there, and the wildcard part both as a separate mesh. We will look at an example of this type of wildcard on the Chirpix in the images below. On the left we see the Chirpix's body with no tail mesh visible, then in the centre we see the Chirpix's body with the normal tail mesh visible, then on the right we see the Chirpix with the wildcard tail mesh visible.

Adding Universal Eyelids (If Applicable)
1 - Download the Universal Eyelid Blend File
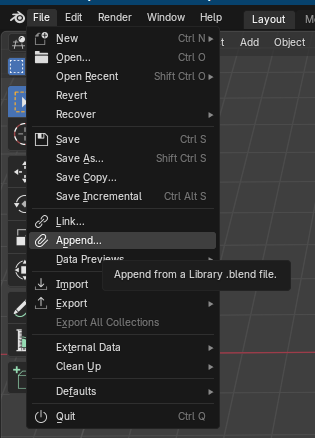
2 - Inside the Blend file of the piñata click File > Append and select the Universal Eyelid Blend File
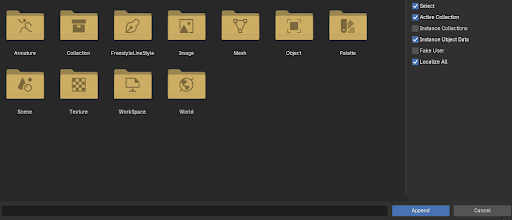
3 - You will now see this selection screen, select only "Collection" then click append.
4 - The eyelid should now have appeared in your scene. In object mode move, and scale the eyelid to one of the piñata's eye-sockets. Make sure the crease in the eyelid is horizontal.
5 - Press Ctrl + A select "Location", this resets the origin point of the eyelid to the world origin.
6 - Select the eyelid and press Shift + D to duplicate it, click immediately to avoid moving the eyelid. Then in the view-port options with the duplicated eye still selected click Object > Mirror >then either X Global or Y Global depending on which way your model is facing.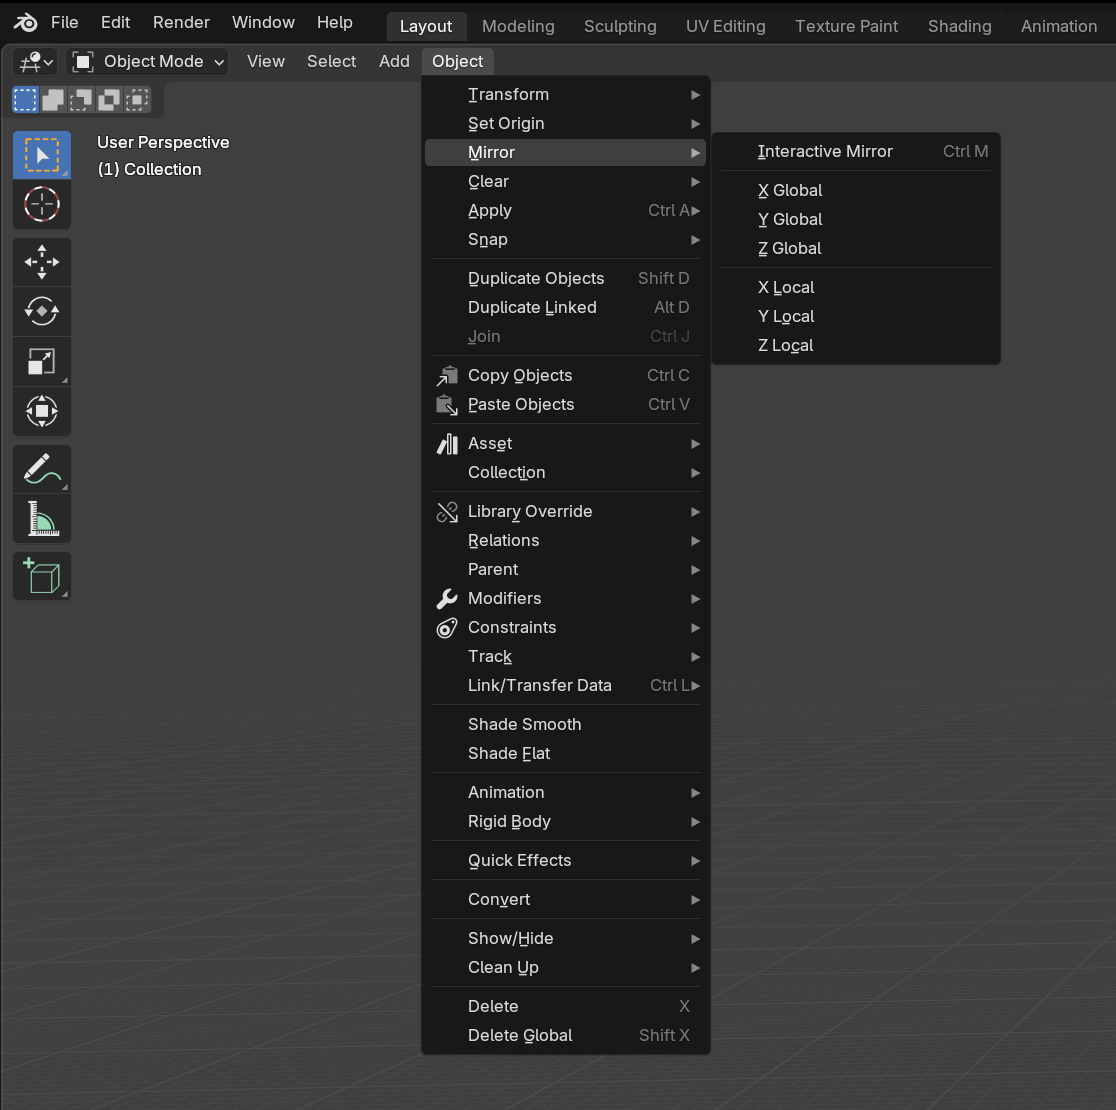
7 - Join both eyelids to the piñata's body mesh (Ctrl + J)
8 - Now test the shapekeys to ensure they work correctly
Troubleshooting the Universal Eyelid
If the eyelid clips into the eyeball, either; scale the eyelid on its Z axis in Normal location mode, or manually edit the shape key that is clipping so that it goes over the eyeball.
The driver bones of the eyelid are set to be neutral at 0 on the Z axis, if the shape keys look all crazy, chances are the bones don’t think they’re (or aren’t) on 0 of the Z axis. Manually resetting the position of the driver bones should fix the issue. If not, contact FireRabbit.
It also may be a unit scale issue, so play with the decimals on the bone constraint menu.
Texturing Guide
Very Important - Piñata Colour Textures Must be Made With Completely Sharp Edges
Unwraping
Under Object Data Properties, create two UV maps for the color map and fur direction. Name them “UVColor” and “UVFur.”
Next, download the Shell Fur Tool for Blender. Don’t unzip the file, simply install and enable the addon in Blender preferences.
Pinatas will have a texture for their mouth main body. Each are unwrapped separately. Rename this UV map “UVColor”
Eyes will be made in Unreal Engine, but we will need to know what color the pupils will be. Just be sure to specify that somewhere so that we can generate the correct eye color in engine.
For the main body, assign the mouth to a new material and unwrap it.
While in edit mode, hide the mouth, then start to unwrap the rest of the body. The wildcard parts (and original parts if a replacement part) must also be included in the texture, so be sure to make room for the relevant parts on your UV map. The goal is to make sure the map has minimal stretching and takes up as much space on the image as possible.
Once you are done unwrapping, you are ready to create the textures.
Resolution for the main body texture is 4k, and the mouth 256x256. For the body, only make one texture that has one of the resident color sets; you’ll see why in just a moment…
Textures should be named with the following convention:
RTP(since the pinata is for the Return To Paradise)_PinataName+TxtrType+Txtr
Whenever you assign the material to your pinata model, be sure to name it using the following convention:
RTP_PinataName+TxtrType+Material
The paper shader in UE works based on UV direction. When UV unwrapping, make sure you switch the UV map to “UVFur” in object data properties.
Use the Fur Shell Tool as a guide and orient the UV islands so that the ‘fur’ flows downward/backward, and the paper strip size is consistent throughout the model. Because of this, it is highly likely that the orientation of your UVFur map will wildly differ from your UVColor map. Since the mouth will NEVER have fur, you only need to orient the unwrapped body segments.
As you test the fur, set your viewport display to material preview.
If the Fur Shape and Mask images were packed inside the Blender file, you may need to reopen them.
Create a black and white texture to tell the shader where not to put fur on the model, where:
black = fur
and
white = no fur
You can test this mask with the Fur Shell Tool. Reference the image in “Mask”. Name in the following convention:
RTP_PinataName+FurMask
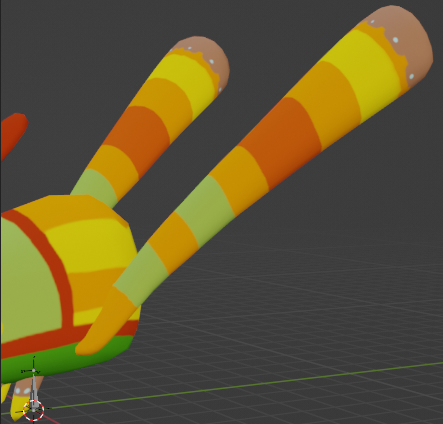
In every piñata, the eye rings and mouth should have no fur. In certain insect or bird piñata, this will also apply to the legs or antennae. If you’re unsure, ask.